This tutorial covers setting up a pretty painless Raspberry Pi Pico C / C++ SDK development workflow on Windows using the Windows Subsystem for Linux (WSL) and Visual Studio Code (VS Code) with IntelliSense code completion!
With the Raspberry Pi Pico microcontroller being so new the current C / C++ SDK development process on Windows is a bit cumbersome. This tutorial should hopefully give you some ideas on how to go about programming the Raspberry Pi Pico the easy way with WSL and VS Code.
Note: This is not a beginner tutorial and assumes some minimal development experience.
The Raspberry Pi Pico is an exciting new microcontroller board launched on January 21, 2021. It’s based on the RP2040 microcontroller (by the Raspberry Pi Foundation) sporting a dual-core ARM Cortex-M0+ running at 133 MHz. The most exciting feature is the Programmable I/O, or PIO, that has 8 independent processors (simple state machines). This is huge for robotics where there’s a need to ingest real-time sensor data in the background while performing other tasks. Keep an eye out for my tutorial on reading multiple DC motor quadrature encoders at the same time without messing with lots of timers and interrupts using the PIO!
Prerequisites
- Enable Windows Subsystem for Linux and install the latest Ubuntu image (20); follow the “Manual Installation” steps. WSL is a built-in feature of Windows 10 and brings most of the power of developing on a Linux machine natively into Windows! Be sure to install Windows Terminal for an even better experience (instructions towards the end of the link above).
- Install Visual Studio Code and install the following extensions: Remote – WSL, C/C++, and CMake Tools. You can search for these extensions by name directly in VS Code.
Configure WSL
Setup Script
If you are in a bit of a rush I’ve created a setup script that will perform all the WSL configuration tasks for you. Just open up WSL, run the following commands, then skip to setting up Visual Studio Code!
cd ~
git clone https://github.com/74ls04/pico-wsl-setup.git
cd pico-wsl-setup
./pico_wsl_setup.sh
This script will install the SDK in ~/pico and also installs a few Pico extras from the Raspberry Pi Pico repos.
Install Dependencies
Note: I’m using Ubuntu 18 for this demo but if you’re starting from scratch use 20 to avoid issues with CMake compatibility.
First, open up the WSL Ubuntu terminal and go to the home directory.
cd ~
Then install the required build dependencies
sudo apt update
sudo apt install git cmake gcc-arm-none-eabi libnewlib-arm-none-eabi build-essential
That’s all there is for dependencies!
Install the Raspberry Pi Pico C / C++ SDK
While still in the home directory create a directory called pico and go into the pico directory
mkdir pico
cd pico
After that clone the SDK and examples git repositories.
git clone -b master https://github.com/raspberrypi/pico-sdk.git
cd pico-sdk
git submodule update --init
cd ..
git clone -b master https://github.com/raspberrypi/pico-examples.git
The git submodule command basically pulls in a separate Raspberry Pi repository from https://github.com/raspberrypi/tinyusb.git and downloads those files.
Here is what all the commands look like after execution.

Configure and Build with Visual Studio Code
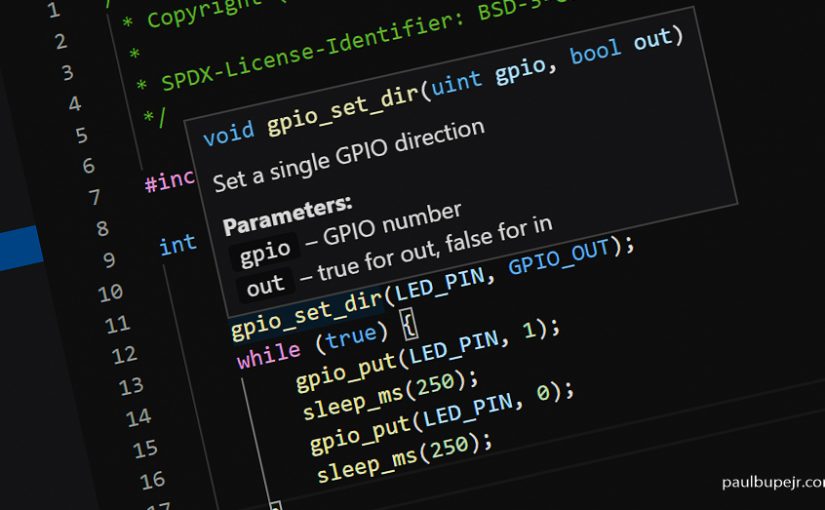
Now we’re going to configure VS Code and build the following “blink” example.
#include "pico/stdlib.h"

int main() {
    const uint LED_PIN = 25;
    gpio_init(LED_PIN);
    gpio_set_dir(LED_PIN, GPIO_OUT);
    while (true) {
        gpio_put(LED_PIN, 1);
        sleep_ms(250);
        gpio_put(LED_PIN, 0);
        sleep_ms(250);
    }
}
So far you should have the following directories:
~/pico
~/pico/pico-sdk
~/pico/pico-examples
Move into the pico-examples directory
cd pico-examples
Now here is where the integration of VS Code and WSL really shines. Open VS Code into this directory
code .
This command will launch VS Code and automatically link it to the WSL instance. You should see a green connection label in the bottom left. This process also creates a hidden .vscode sub-directory that will hold the VS Code configuration for this workspace.

If this is your first time using VS Code with WSL follow these quick instructions to make sure the three extensions mentioned at the top are also installed in WSL. At this point you may see a notification asking if you would like to configure the project — click on “Not now” as we need to set up a few things first.

Configure CMake Extension
Click the gear icon in the bottom left and select Settings.

Expand the Extensions tree, select CMake Tools configuration, and then click Add Item under “Cmake: Build Environment” to add the SDK path as shown below. If you followed the directory structure in this tutorial your PICO_SDK_PATH will be /home/$USER/pico/pico-sdk where $USER is your WSL username. In this case my tutorial username is “main.”

Configure IntelliSense (Code Completions)
Open the Command Palette, Ctrl+Shift+P, and start typing “C/C++” then select C/C++: Edit Configurations (JSON).

This will create the following file:
/home/$USER/pico/pico-examples/.vscode/c_cpp_properties.json
Change the file to match the following settings. Keep in mind that these settings are purely for code-completion and have nothing to do with the actual compiling.
{
    "configurations": [
        {
            "name": "Linux",
            "includePath": [
                "${workspaceFolder}/**",
                "/home/$USER/projects/pico/pico-sdk/**",
                "/usr/lib/gcc/arm-none-eabi/**"
            ],
            "defines": [],
            "compilerPath": "arm-none-eabi-gcc",
            "cStandard": "c11",
            "cppStandard": "c++17",
            "intelliSenseMode": "gcc-arm",
            "configurationProvider": "ms-vscode.cmake-tools"
        }
    ],
    "version": 4
}
Replace $USER with your WSL username under “includePath”!

Close VS Code and relaunch it again from the terminal with
code .
This time when CMake asks whether you’d like to configure the project select “Yes” and wait for it to finish configuring.
Configure Compiler and Build
Tell VS Code which compiler to use by clicking the “No Kit Selected” text at the bottom

Then selecting GCC for arm-none-eabi... If using Ubuntu 20 your compiler version will be different since I’m using 18.

Open up the “blink.c” example file using the explorer menu on the left, CTRL+SHIFT+E. You should see no errors highlighted in the file and code hints should be working as well.

Tell CMake which project to build by clicking on [all] at the bottom

Then scroll until you see “blink.”

You should now see [blink] instead of [all]. Click on “Build” to build the project!

VS Code will automatically create a build directory and spit out the project binaries into that directory.

Keep in mind this built the debug configuration, you can change it to release by clicking on CMake: [Debug]: Ready at the bottom.
Upload to Raspberry Pi Pico
Uploading the binary to the Pico is just a matter of dragging the .uf2 file into the folder that opens when you plug in the Pico while holding down the BOOTSEL button.
The file to transfer is:
/home/main/pico/pico-examples/build/blink/blink.uf2
To open the directory you can either right clock on the directory name in VS Code then click “Reveal in Explorer” or just type
explorer.exe .
in the WSL terminal to open that directory in Windows Explorer. That’s one of the most useful WSL commands!
Plug in the Raspberry Pi Pico while holding down the BOOTSEL button and then drag over the .uf2 file to the Pico folder.

It will automatically disconnect after transferring and immediately start running the program!

It’s also pretty easy to configure VS Code to automatically move the file after building but for the sake of keeping this short I’ll save that for another time.
More to come!
This should hopefully give you an idea of how the current development process is for the Raspberry Pi Pico. My goal is to create another robotics-focused Pico tutorial in the coming months starting from scratch and using the PIO — maybe in conjunction with a Raspberry Pi!
Feel free to ask any questions or offer suggestions in the comments!
Updated: 2/11/2021
I can’t get past the error:
CMake Error: Could not create named generator NMake Makefiles
During which step are you seeing this error?
Thanks – this seems to be resolved by changing the cmake generator to: Unix Makefiles.
The problem I have now is if I create a new folder within the pico-examples subfolder and put my code files in it, the folder does not appear in the build list and my project is ignored – it won’t compile!?
Aah – sorted – have to add a line to the root CMakeLists.txt….
add_subdirectory(myprojname)
Turbo Pascal was so much simpler!
Amazing work, thank you! I’d managed to get a compiler working in WSL by myself, but hadn’t known about VS Code linking to WSL, along with auto completion.
This is going to make my Pico dev (and other projects like my hobby OS) *so* much easier!
I’m glad this was helpful! The integration between VS Code and WSL is quite powerful.
You can also connect VS Code to a Raspberry Pi (any Linux OS really) and edit code directly on the Pi via VS Code.
I’m hesitant to use this approach (WSL2) because I don’t think it will support GDB debugging with OpenOCD. WSL2 still doesn’t natively support access to USB devices.
Have you managed to get OpenOCD working?
I haven’t had a chance to try that out yet but you’re right, WSL doesn’t play well with USB. I think, though, it’s just a matter of time until they get that figured out since it’s too big of a feature to not have.
Thanks for writing this up!, I spent a whole day yesterday trying to get the toolchain to work on Windows unsuccessfully. Your tutorial had me up and running in an hour, tops.
Glad it was helpful!
Overall, I found this tutorial EXCELLENT. I was a bit confused when installing VS Code (do I install it in Windows or Ubuntu, then, later, understood the link between Windows and Ubuntu. I also had a bit of confusion when configuring CMake (didn’t understand that I needed to select the extension first before I saw the correct configuration to modify). That is probably because I am not a seasoned VS Code developer. I got past those hurdles and am now successfully completing and downloading code. So, thank you so much for the excellent tutorial.
It’s definitely a bit of an involved process if you’re not used to the workflow – glad you were able to get it working!
One question. Once you build the blink example, how do you then select another project? For example, I2C_scan. I opened the c file, but how do you get VS Code to select [bus_scan] and then compile? Thanks.
You can select it from the blue bar at the bottom. Clicking on the name of the active project there will bring up a list of all the detected ones in your directory and you can select from there.
Hi, first, thanks so much for the instructions!
Second, when it comes to setting up the “IncludePath”, do we really need the word ‘project’ here?
“/home/$USER/projects/pico/pico-sdk/**”,
I am getting an error that this folder does not exist and all the instructions above suggested creating the pico directory directly under user’s home directory.
I agree Alireza, the project subfolder shouldn’t be there, as every other tutorial for setting up pico’s puts a pico folder directly in your ~ home folder. no projecy sub.
Hi again, I finally got it working after I added PICO_SDK_PATH to “Cmake: Configure Environment” instead of “Cmake: Build Environment”. Without this change, project configuration as well as any attempt to build the project would fail with an error that PCIO_SDK_PATH is not set. I am using WSL2 with Ubuntu 20.04 so maybe that’s why I had to make this change. I also removed the word ‘project’ from the “include” path.
Writing my programs in C instead of Micro Python is priceless!
This worked for me too!
Thanks for your suggestion!!
Great guide! One thing that tripped me up is that when I was adding PICO_SDK_PATH to the CMake build environment, I was doing it on my local windows machine and not the WSL2 instance! Make sure to edit the settings under the Remote: [WSLXXX] tab in VSCode to get the build environment variables to pass through correctly.
Just some trouble shooting notes:
In the c_cpp_properties.json you may need to better define the compiler path, I had to set it to “/usr/bin/arm-none-eabi-gcc”
Also if you are using the raspberry pi pico W, you need to add some settings in order to properly access the sketches:
Go to “\pico\pico-examples\pico_sdk_import.cmake” and add the following to the top of the file :
set(PICO_BOARD pico_w)
set(WIFI_SSID “Name of your WIFI network”)
set(WIFI_PASSWORD “Your wifi password”)
There are other settings to define if you want to use the examples that interact with a webpage I think. I don’t think it HAS to be that specific cmake file but that is how I did it and it managed to compile and run properly on my pico W.
I needed to upgrade cmake to a version > 3.10 (which is the latest one in ubuntu 18) because the current pico-sdk requires at least 3.12. Newer cmake versions can be found here: https://apt.kitware.com/
Thank you for putting this together, I was able to follow and build examples (with some adjustment “/project/”).
May I request a follow-up article? I would like to set up this environment in a new directory (eg ~/proj/) but when I attempt this VS code goes back to vanilla, and I am having a lot of trouble to build the same environment “from scratch”
I did not expect an easy success, especially seeing all the steps you have to take. But my board blinked at the end !
Thanks a lot.
Having a guide on creating a new project would be helpful: I tried to make some test code in pico/tests/myBlink folder but I’m getting a compile error stating that VS code is not able to find pico/stdlib.h file!
I just started using VS code and I would appreciate some guidance on this kind of errors.
Also, both in building blink example and my modified code I get the following linking error:
The C compiler
“/usr/bin/arm-none-eabi-gcc”
is not able to compile a simple test program.
It fails with the following output:
(bla bla)
Linking C executable (…) /usr/lib/gcc/arm-none-eabi/9.2.1/../../../arm-none-eabi/lib/libc.a(lib_a-exit.o): in function `exit’:
(…) undefined reference to `_exit’
Thanks for this great tutorial! You saved me a lot of time and frustration! *thumbs up*
But unfortunately, I am still struggeling to connect the serial console within Visual Studio Code to the Raspberry PI Pico. Do you have any idea or hint? In addition, I am also interested in debugging the Pico within Visual Studio Code using a Pico Debugger Probe.
Have you tried this already?
Best regards, Sven
This guy covers it well.
https://learnembeddedsystems.co.uk/pico-usb-serial-code
Great Guide!
I have one issue though:
When i try to compile anything in Windows i get this message: “Unable to determine what CMake generator to use. Please install or configure a preferred generator, or update settings.json, your Kit configuration or PATH variable. Error: No usable generator found.”
However if i run VScode in WSL, it complies just fine.
I can find alot (too many) examples of this error, but not in the context of WSL.
Can you help me?
Tks
Thank you for writing this.
Have you tried to get the debug probe running under wsl?